How to Pipette: 10 Steps to Becoming a Pipetting Pro
Pipetting is a fundamental skill in laboratory work, yet even small mistakes can lead to inaccurate results. Proper pipetting technique ensures precision, reproducibility, and reliability in every experiment. From selecting the right pipette to mastering the correct dispensing method, understanding these steps can significantly improve accuracy.
This guide outlines the 10 essential steps to becoming a pipetting pro, covering everything from choosing the right pipette and tip to advanced pipetting techniques.
For a printable version to hand out or keep as reference in your lab, download our 10 Steps to Becoming a Pipetting Pro PDF.

Find The Right Combination of Pipette and Tip
Step 1: Use the Optimum Volume Range
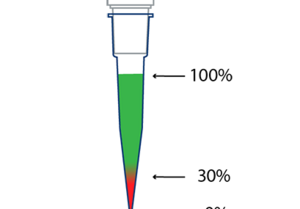
For the highest precision, use the upper volume range of a pipette. If your target volume falls below 30% of the pipette’s nominal volume, switch to a smaller volume variant to maintain accuracy.
Step 2: Fit of the Tips
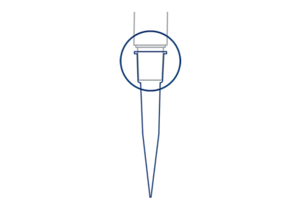
A properly fitted pipette tip is essential for avoiding leaks and ensuring accurate liquid measurement, so always double check that the pipette tip is securely in place. To achieve the best fit, always use original tips from the pipette manufacturer.
According to ISO 8655 standards, improper tip fit can contribute to measurement deviations of up to 50%, making it one of the most significant factors affecting pipetting accuracy.
Preparatory Steps for Accurate Pipetting
Step 3: Perform Temperature Equalization
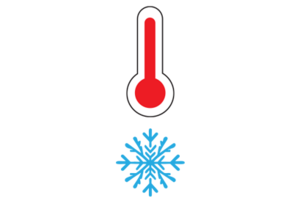
Temperature differences between the pipette, tip, and liquid can cause volume deviations due to air expansion or contraction. To prevent errors, allow all components to reach the same temperature before pipetting. Temperature equilibrium can take roughly 2 hours, so if this is not possible, be sure to not saturate the air cushion and also change the tip after dispensing each volume to minimize inaccuracies.
According to ISO 8655 standards, temperature variations can lead to measurement inaccuracies of up to 0.3% per degree Kelvin (K). Even a small difference of 5°C between the pipette and liquid can result in a 1.5% volume error.
Step 4: Pre-Wet the Air Cushion
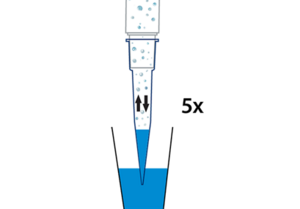
Before pipetting, aspirate and dispense the liquid at least 5 times to saturate the air cushion inside the tip. This helps prevent liquid evaporation and improves pipetting consistency, particularly for small volumes or volatile liquids.
According to ISO 8655 standards, failure to pre-wet can lead to measurement deviations of up to 2%. This variation can impact precision, especially in low-volume pipetting applications, where even small errors in the dispense volume can affect results.
Volume Aspiration: Best Practices for Pipetting Accuracy
Step 5: Correct Immersion Angle
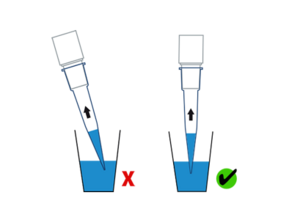
When aspirating liquid, hold the pipette in a vertical position and keep the immersion angle at a maximum of 10 degrees. Tilting the pipette excessively can result in inconsistent volumes and compromised accuracy.
According to ISO 8655 standards, an improper immersion angle can lead to measurement deviations of up to 1%.
Step 6: Proper Immersion Depth
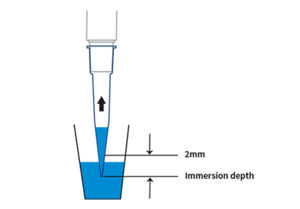
To ensure accurate aspiration, the pipette tip must be immersed at the correct depth. An improper depth can introduce air bubbles (if too shallow) or lead to excess liquid uptake (if too deep), both of which affect precision.
- For volumes up to 1000 µL: Immerse the tip 1-2 mm into the liquid.
- For volumes greater than 1000 µL: Immerse the tip 3-6 mm into the liquid.
According to ISO 8655 standards, incorrect immersion depth can lead to measurement deviations of up to 1%.
Step 7: Allow the Proper Waiting Period
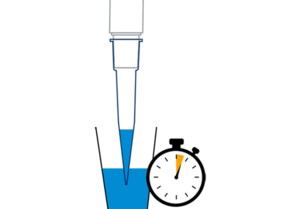
To ensure complete liquid aspiration, wait:
- 1 second for pipetted volumes up to 1000 µL
- 3 seconds for pipetted volumes greater than 1000 µL
Removing the pipette too quickly may lead to incomplete aspiration.
Volume Dispensing: Avoiding Pipetting Errors
Step 8: Wipe During Volume Delivery
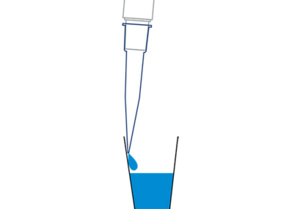
For large-volume pipetting, touching the pipette tip to the vessel wall while dispensing ensures the entire liquid volume is transferred. This is particularly useful for reducing residual liquid in the tip when pipetting viscous samples.
According to ISO 8655 standards, not wiping the tip properly can result in measurement deviations of up to 3%
Pipetting Techniques for Maximum Accuracy
Step 9: Use Uniform Pipetting Rhythm
Uniform pipetting ensures consistent results. To maintain accuracy, always press the plunger to the first stop with the same force, speed, and rhythm, then allow it to return smoothly to its rest position before the next aspiration. Variations in pressure or motion can lead to inconsistent aspiration and dispensing. Keeping a steady, repeatable technique improves precision and reproducibility.
Note: Using electronic pipettes reduces the individual influence of the user.
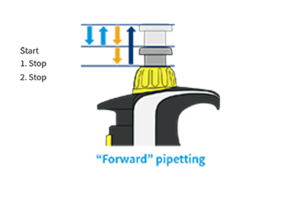
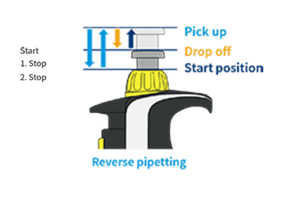
Step 10: Choose the Right Pipetting Technique
The correct technique depends on the liquid type:
- A forward pipetting technique is best for standard aqueous solutions.
- A reverse pipetting technique is recommended for foaming, volatile, or viscous, liquids, improving precision and minimizing bubbles.
Mastering Pipetting: Final Tips & Takeaways
By following these 10 essential steps, lab professionals can improve accuracy, precision, and reproducibility in pipetting. Key takeaways include:
- Use the correct pipette and tip combination to ensure a secure fit and minimize inaccuracies.
- Maintain a consistent pipetting rhythm to enhance reproducibility.
- Apply proper immersion depth and angle for accurate aspiration.
- Pre-wet the pipette tip when necessary to improve precision, especially for small volumes.
Following these best practices helps reduce errors and ensures reliable lab results.
